Drain Lines…Camera…Action
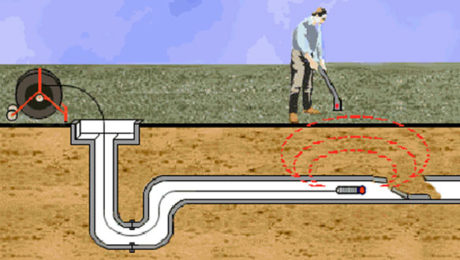
We’ve come a long way since the days of physically digging up plumbing pipes in order to locate a problem. Today, inspections are done with a video line camera which provides a visual inspection of sewer lines or other underground pipes located in cement or under the foundation.
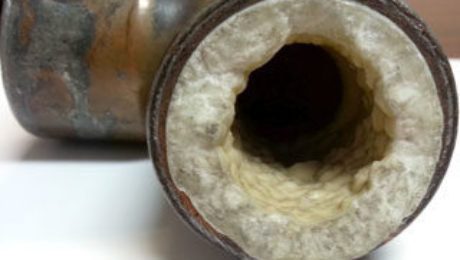
This specialized camera sits at the end of a flexible rod. The rod travels through pipes, providing real-time video image transmission. The camera records the physical location and depth of any blockage, corrosion, grease buildup, leaks, and broken or collapsed pipes.
If you notice you have repeated drain line backups, slow drains or frequent clogs, an inspection is a good idea. Pinpointing the problem area saves you from having to unnecessarily replace pipes. Inspections can also be helpful in finding valuables that may have slipped down the drain.
Once the problem has been identified, there are generally two solutions. For cleaning out sludge and debris buildup, a process called Hydro Jetting uses high speed / high pressure water to clear blockages in pipe systems.
For broken or collapsed lines that need to be replaced, the camera makes locating the pipe much easier, resulting in a faster repair process. Once the service has been performed, repeat the camera line inspection to be sure the problem is fixed.
Recorded images can be saved for permanent records. It’s also a good idea to have an inspection done before buying a home to ensure there are no major problems.
If you suspect a problem, or need an inspection for other reasons, give us a call. All Pro Plumbing Services are available in Osceola County, Seminole County and Orange County, Florida.
- Published in Tips of the Trade
Nature vs. Plumbing
The unfortunate reality is that nature can wreak havoc on you’re plumbing system. The good news is that with regular maintenance and inspection, you can prevent damage or at least minimize the problem.
Roots
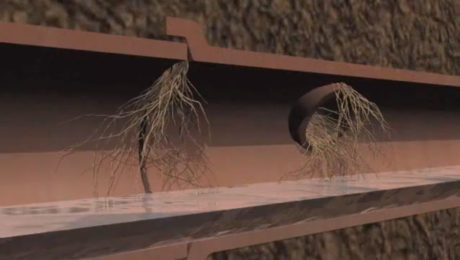
Known as “root intrusion” the name is fitting for one of the biggest culprits of broken pipes. Your sewage drainage system is crucial to the overall functionality so keeping it maintained will save you from costly repairs.
Generally, visible roots are only a portion of the entire root. Even a small puncture allows roots to grow through and obstruct the pipe. In Orlando and Central Florida, we have a high water table making it easier for the roots to seek out the water source. If you notice a slow in water flow, or if multiple fixtures such as the toilet, sink or shower start backing up, most likely you will need to repair or replace a pipe. This should be done by a professional plumber. Cleaning the interior with chemical or herbicide treatments is a temporary fix and won’t solve the real problem. Also, some of the treatments are illegal and can carry large fines.
Lightning
It’s rare to associate lightning with plumbing issues, but it’s a real concern. Especially in Central Florida which has ten times as many lightning strikes as the rest of the country. When lightning strikes the water distribution systems, it can cause pinhole leaks and sometimes even burst the pipes, costing thousands of dollars in uninsured plumbing repairs.
The theory is that lightning sends electricity shooting through the ground when it strikes. It seeks out buried, copper pipes or the home’s ground rod. It moves through the pipe until it reaches a dead end, usually at a plastic junction. The electricity needs an outlet, so the charge jumps from copper to water leaving a hole in the pipe.
To keep abreast of any damage, it’s wise to do a visual check for leaks by inspecting all appliances and fixtures that need plumbing. If you find a leak, get a professional pressure test and repair even small leaks before they get worse.
Warm Weather
Heat is also damaging to your pipes. When the ground dries out from lack of rain, it causes the house to settle which can cause your water main to crack or leak. Ultraviolet Rays can also damage exposed pipes so be sure to cover them with insulation.
Buried pipes have an increased water pressure which adds strain to the pipeline walls. Older pipes are often made of concrete making them more susceptible to breakage.
It’s important to keep the ground as moist as possible, however, with the increasing need for water conservation, watering around the foundation is most important.
If you suspect damage, call All Pro, we’ll find the cause and fix the problem.
- Published in Tips of the Trade
Beating Backflow
When it comes to plumbing systems, there are a lot of things we take for granted- clean water being one of them. But this necessity isn’t a given. Contaminated water can enter your private water system, or even worse, the municipal system. Fortunately, there’s a stop-gate for that— literally.
Here’s how it works. Water should be a one-way flow, but when normal water pressure drops from things like a water line breaking, or a fire hydrant being used, causes the pressure to drop which reverses the supply water sucking contaminated water back into the system. This can happen from any source that is cross-connected such as toilets, dishwashers, washing machines and sprinkler systems. A backflow devise protects your home from this happening. If the water is flowing in one direction, the backflow devise remains open. If the water flow is reversed, the backflow device creates a physical barrier to stop the contaminated water from entering.
There are three main types of backflow devices:
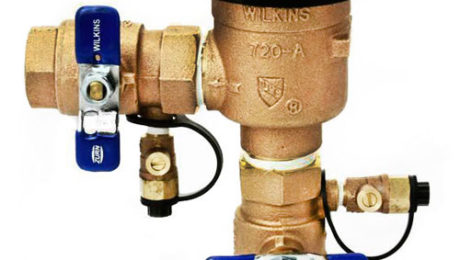
• Reduced Pressure Principle Assembly. This device is best for major hazard applications. It’s the most complex and therefore more expensive, but it’s the most reliable and secure.
• Pressure Vacuum Breaker Assembly. This is the most common whole-system backflow device used most often for irrigation sprinkler systems.
- Atmospheric Vacuum Breaker Assembly: This inexpensive device is used for single fixture applications such as toilets, urinals, and some faucets.
• Double Check Valve Assembly: This device is used for underground or in-line installations, meaning, the devise runs parallel with the piping of your sprinkler system.
Fresh water isn’t something to reckon with, so there is also a second line of defense, the Dual Check Valve, which controls the backup at the cross-connection point.
For new construction, ALL PRO Plumbing can help you figure out the best solution for your needs. For existing systems, it’s important to have the devices tested periodically. Because of the moving parts including internal seals and springs, a lot of wear and tear can occur.
- Published in Tips of the Trade
Plumbing Problem Prevention
Face it, it’s easy to ignore your plumbing system until something goes wrong. Really easy. But taking the time to check your system can keep problems at bay, saving you a lot of time, money and hassle. So roll up your sleeves, don the rubber gloves and get to work.
Drain your water heater. Keeping your water heater clean isn’t hard, but it is important. First, turn off the power and/or gas supply to the water heater.To drain, attach a hose and drain the water into a bucket. Briefly turn on the cold water valve, which will stir up the sediment. Drain again and repeat until the water comes out clean.
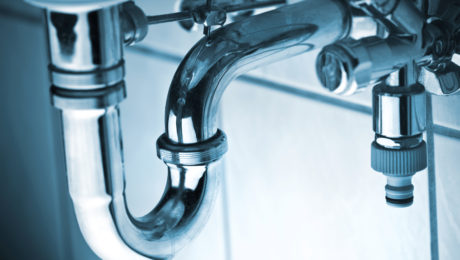
Check your drains. Clogged drains can be a real mess, so do a once-over to see if you suspect one coming your way. Is there a lingering smell? Does it drain slowly? Does it get clogged frequently? If so, either shut off the valves and open up the pipes to clean them, or call a plumber. Liquid drain cleaners aren’t recommended since they can erode the pipes and make clogs worse.
Clean the toilet tank. Yes, we said the tank. Doing so can extend the lifespan of your toilet. Standing water brings about mold, and debris can erode the rubber on the plunger and flapper. To clean, turn off the water and flush the toilet. Mix 1/4 white vinegar with 1 c. water and scrub. We don’t recommend toilet tabs because they contain bleach which can erode the parts. Either way, always wear gloves.
Check for leaks. For the toilet, put a few drops of food coloring in the tank. Wait 10 minutes, and if the color leaks into the bowl, you have a leak. If you see your faucets and showerheads dripping, don’t wait to fix them. You would be surprised at how much water (and money) is wasted through drips.
Some of these suggestions can be easily handled, but if you don’t trust your skills, call an expert for a plumbing inspection. Trite as it sounds, an ounce of prevention is worth a pound of cure!
- Published in Tips of the Trade
6 Tips to Holiday-Proof Your Plumbing
Deck the halls, wrap the gifts and check your plumbing. Holiday gatherings bring good cheer, good food, and extra stress on your drains, garbage disposal and plumbing system. A few precautions can make all the difference, so take note and get ahead of the game.
1. Make sure you have mesh screens over your sink and tub drains. You never know what a little munchkin might drop into the sink or bath. (Not to mention the extra food and hair.)
2. Your garbage disposal can only do so much. The intention is not to absorb all of your food waste. Only put small scraps in the disposal, scrape the rest into the trash. Never put these foods down your garbage disposal: coffee grounds, meat, poultry, fish, beef or pork bones (chicken bones are okay), pasta, rice, bread, potatoes, fruit or vegetable peels. Have cold water running through the disposer the entire time you are using it, this keeps the food firm and it chops up better.
3. Don’t pour grease down the sink. This is bad on all levels— the disposal, the drain pipe, the smell…you get the picture.
4. Space out showers. If everyone waits until the last minute, someone’s getting a cold shower. Give your water heater time to re-heat the water in between. (Tip: Have some people bathe at night.)
5. Make sure your toilet isn’t continuously or randomly running. If it’s running and not being used, it could be a faulty rubber stopper. This is easy to change, and expensive if you don’t.
6. When all else fails, keep a drain snake and toilet plunger handy. Let’s face it, life happens and things can get messy.
- Published in Tips of the Trade
Take a Little (Water) Pressure Off
Yes, it’s nice having powerful water pressure for things such as dishwashers or showers, but the reality is, high water pressure puts extra strain on your pipes and can wreak havoc on your plumbing system—not to mention ceilings, walls and floors if a leak occurs. It also puts additional stress on appliances such as your washing machine and water heater. Over time, even pinhole leaks can cause expensive damage. Excessive force can cause pipe joints to break, valves to leak, and over time cause toilet parts to succumb.
High water pressure also wastes water, and what you may not know is that many municipalities not only charge for water consumption, but also for the disposal of wastewater. Reducing water consumption also reduces the excess energy needed to heat the additional water- hence, more money in your pocket.
There are a number of indications your pressure is too high. Typically you will hear banging somewhere in your pipes, or you may have leaks in fixtures that only appear intermittently, such as at night. Another indication is when toilets start running when they are not being used.
There are a few reasons your water pressure could be higher than needed. One of the major causes comes from the municipal water supplier, who can often set the pressure to meet their own needs such as delivering water to fire hydrants or high elevation buildings. These are often set over 100psi, and too often over 150psi. For a residential home, the maximum should be 80psi. Living at the bottom of a hill is another common reason for high water pressure.
Fortunately, the solution is simple. A water pressure reducing valve automatically reduces the pressure from the water supply to a slower, more sensible pressure. The valve is installed directly after the water meter and even if the supply water pressure fluctuates, the pressure reducing valve ensures a constant flow at the set pressure.
There are different types of valves, along with different installation configurations, so if you are inexperienced in plumbing, this is a job that is best left to a professional.
- Published in Tips of the Trade
Hard Water Fixes? Not Hard at All.
Where the term “hard water” originated is a bit uncertain. Some people say it’s from the minerals “hardening” on the surface, some say because it’s “hard” to clean, and others say it’s because it makes it “hard” to get soap to lather.
Whatever the origin, due to the amount of minerals, hard water has a big impact on day to day life. It can shorten the life span of clothes by up to 40%, dry out skin and hair, damage the functionality of appliances, leave spots of film on dishes, clog pipes, reduce water flow and can increase energy bills by up to 25%.
Don’t worry, it sounds like a daunting list, but with some maintenance, you can keep the damaging effects at bay and it becomes nothing more than a nuisance.
First, let’s talk about the problem. What causes hard water?
Hard water is contains calcium, magnesium and sometimes even iron. It is created when the water absorbs the minerals while passing through soft rock such as limestone. (And Florida’s land contains large amounts of limestone.)
Don’t fret, you have options.
Option 1: Purchase a water softening system.
These systems can eliminate the calcium and magnesium replacing them with a softer mineral like sodium or potassium. Systems will vary in cost depending on the size of your home, but if it’s financially viable, this option could double the life of your appliances.
Option 2: DIY
When it comes to do-it- yourself pipe and plumbing fixture cleaning, you can either use a commercial hydrochloric acid product (**Use with extreme care** Muriatic Acid is a weaker form of Hydrochloric Acid, however extreme care is still highly recommended.) or a natural cleanser of vinegar and baking soda. Both work well, however the commercial products can be expensive, and you don’t want to risk getting it into your potable water. (Also be sure to wear gloves and goggles while working.) The benefit to this method is that it only takes about 10-15 minutes and the instructions are pretty self explanatory. With a natural cleanser, it takes more time but is less expensive and as the name implies, is all natural. We’re going to give you the low-down on the natural method, but as we said, it’s a personal preference.
The Natural “How”
To clean fixtures:
Use one part white vinegar to 3 parts water. Dismantle removable parts and put to soak in vinegar solution. Use a toothbrush or other soft bristle to scrub calcium away. For the main fixtures, soak a soft cloth with the solution, then wipe the fixture to remove any flaking. Rinse cloth, re-soak in vinegar solution, then wrap around the fixture for 15 minutes. The rest of the deposits should clean away easily.
For Pipes:
For a 1,000 sq. foot home, you will need 2-3 gallons white vinegar and 1 cup baking soda per drain.
Fill a large pot of water for each drain. Shut off all taps, including any outdoor faucets. Put 1 coup of baking soda down each drain and slowly pour in the vinegar, (as much as the sink will hold,) it should bubble and fizz. This solution should sit for about 3-4 hours. 30 minutes before the solution is ready to drain, boil the pots of water. When ready, pour down the drains quickly and forcefully, which will dissolve grease and soap and help sanitize. Open the faucets one by one at full blast. You may see calcium and limestone chunks, which is normal. Some of the residue may be powdery and stuck at the bottom of the pipes. It’s a good idea to open the drain pipes and clean out the p-traps.
Just remember, it’s not rocket science, but it is important not to let it go too long or you may end up replacing pipes.
- Published in Tips of the Trade
Sun, Sea, Sand and Sump Pumps
Yes, we said sump pumps. While Florida is known for it’s warm weather and sand, rain and severe tropical storms are also a reality. In 1987 the Federal Clean Air Act required all new construction to have a sump pump, but it’s just as important in existing homes, particularly if the property is prone to flooding.
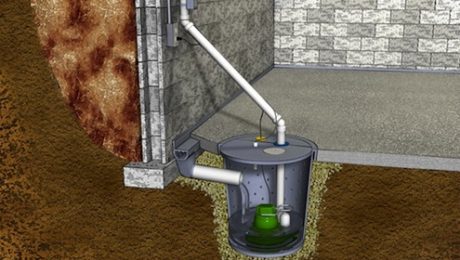
What’s a sump pump? An electric pump installed either in the basement floor or outside the home in a basin which is below the lowest level in the house. which The pump is activated by rising water and removes the water from the house or from below the house before flooding occurs.
There are two types of sump pumps; submersible and pedestal.
A submersible pump sits entirely within the sump basin. When water is present, some or all of the pump is submerged. As the water rises, a float or pressure switch turns on the motor and pumps it out to a minimal water level. Because the pump is underwater, it runs cooler and lasts longer. Another benefit is because everything is contained within the basin, it can be covered with a lid.
A pedestal pump is mounted on a stand above the sump basin, where most of it remains dry. The water comes up through a suction pipe and the pump is triggered by a float or pressure switch. Since the motor and electrical connections are not submerged, it’s easier to perform routine maintenance and switch components. The downside is that the pump isn’t covered.
It’s easy to forget about the sump pump when doing regular plumbing maintenance, but this is one fixture you don’t want to neglect; when you need it, you REALLY need it.
Three things can cause your pump to fail:
• Clogged discharge lines
• Power failure
• Lack of maintenance
Keep in mind, during heavy storms or prolonged periods of rain it’s not uncommon to lose power. Power failure can be mitigated with a battery back-up system, which is highly recommended. To avoid the other two causes, test your pump regularly. A professional can test more thoroughly, but you can certainly do it on your own if necessary.
To check:
• Make sure the power is on.
• Clear debris from the sump basin.
• Fill the basin with water to the level where it will activate the pump.
• Lift the float and make sure the pump kicks in. (If it doesn’t, don’t leave it running, which could cause damage.)
• If the pump is working, let water run through it to clear out the debris.
• If it’s not working, call for repair.
- Published in Tips of the Trade
5 Tips to Keep Your Water Heater Healthy
Most people would agree, hot water is important.
What you may not know, is when water is pumped in, dirt and minerals also make their way into your water heater, which makes the heater work harder, and unfortunately, causes it to slowly rust.
It sounds worse than it is. With the right maintenance, your water heater should last about 15
years, and fortunately, it’s not difficult. Here are five things you can do to keep things running smooth and efficiently.
1. To save on energy costs, turn the thermostat down to 120 degrees. For every 10 degrees you lower the temperature, you’ll save approximately 5% in energy.
2. Insulate older units to improve efficiency. This reduces heat loss by up to 45% which could shave an average of 9% off of your water heating costs.
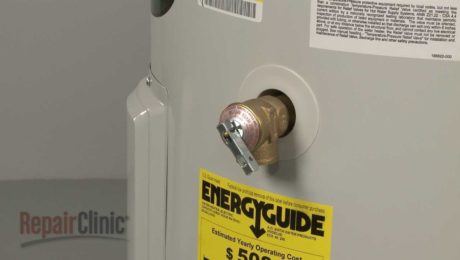
3. Each year test the Temperature and Pressure Relief Valve (TPRV.) This valve prevents excessive pressure and keeps the water heater from exploding. To test the TPRV:
• Turn off the power and cold-water supply valves.
• Place a bucket underneath.
• Lift the valve to let some water out, then let go, if it keeps flowing or dripping, you’ll need to drain the tank partway and install a new valve.
4. Drain 1/4 of the tank a few times a year to remove sediment and debris, (and the heater will
run quieter.) To drain:
• Turn off the electric or gas to extinguish the pilot light.
• Hook up a garden hose to the drain and run water to the exterior or bathtub ten to fifteen minutes. Make sure no other hot fixtures are in use while performing this.
5. Change the Viable Anode Rod about every five years before it fails. Doing this could double the life of your water heater. The rod attracts corrosive elements and keeps them out of the water. However, when the rod itself gets corroded, it can’t do its job and the water heater could rust. (Do not remove it permanently or it will void manufacturers warranties.) There are a couple of options for the type of rod you use.
• A magnesium anode rod protects better but doesn’t last as long.
• Aluminum/zinc rods are cheaper and are recommended for smelly water.
• Be sure to consult a water treatment specialist before purchasing and installing a new rod.
- Published in Tips of the Trade
10 Plumbing things to check before buying a home
10 things to check about the plumbing before buying a home.
It’s true, older homes are charming and full of character. In many cases the materials stand the test of time but not always; plumbing is a different animal. Below are 10 things to check before writing the big check.
1) Sewer line. Have a professional look at the sewer line to the street. It’s important to run a video camera through the line to identify potential problems. Tree roots, corrosion or clogs can all break down the pipe, and trust us, you don’t want it to collapse.
2) Water heater. Check the age, water heaters should last at least 10 years, if it’s much older than that, you might consider replacing it. Look at the location, will it cause problems if it leaks?
3) Toilets. Check for leaks at the base, this can lead to significant damage. Sealing the leak will make the problem worse. Look for a rocking toilet, discoloration at base or warping. Flush each toilet to make sure there are no clogs.
4) Water supply pipes.
- Determine the age of the pipes and whether or not they have been replaced.
- Are the pipes copper or plastic? If so, they have probably been replaced. Most copper and plastic don’t corrode like steel. However, some plastic is not approved for use inside, such as PVC pipe.
- If they are galvanized steel, they are probably old and will eventually have to be replaced. Look for small holes which could be rust.
- Are the pipes a mixture of different materials? This is usually a sign of minimal repairs being done and could require replacement.
- If the pipes are cast iron, they will have to be replaced because of mineral build up, corrosion or leaks.
- Pipes made from polybutylene should be replaced. These pipes a grayish, flexible plastic used from the 1970’s to the 1990’s. Chlorine erodes them over time.
- All lead pipes should be replaced.
5) Inside water lines. Check the lines you can see—either under the sink or in the basement ceiling. Look for water discoloration or leaks.
6) Drain lines. Even though these lines generally don’t corrode, play it safe and look down the drain.
7) Water taps. Turn on the taps to check for rust. If the home has been sitting vacant, it’s normal for a bit of rust to drain out, but if the house is occupied it could be corrosion.
8) Water Pressure. To test the water pressure, turn on all faucets at once. To get high enough pressure, you’ll need 3/4” pipes from water source to home, and at least a 1/2” or more to faucets.
9) Crawl space and basements. Look for water damage, leaky pipes or inadequate repairs.
10) Shower pressure. Although there are many models with varying pressure, make sure there is a solid stream of water.
- Published in Tips of the Trade
- 1
- 2

