6 Tips to Holiday-Proof Your Plumbing
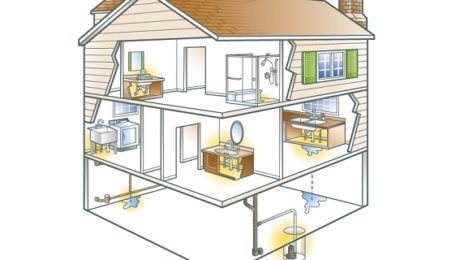
Deck the halls, wrap the gifts and check your plumbing. Holiday gatherings bring good cheer, good food, and extra stress on your drains, garbage disposal and plumbing system. A few precautions can make all the difference, so take note and get ahead of the game.
1. Make sure you have mesh screens over your sink and tub drains. You never know what a little munchkin might drop into the sink or bath. (Not to mention the extra food and hair.)
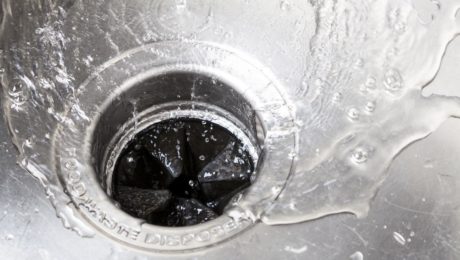
2. Your garbage disposal can only do so much. The intention is not to absorb all of your food waste. Only put small scraps in the disposal, scrape the rest into the trash. Never put these foods down your garbage disposal: coffee grounds, meat, poultry, fish, beef or pork bones (chicken bones are okay), pasta, rice, bread, potatoes, fruit or vegetable peels. Have cold water running through the disposer the entire time you are using it, this keeps the food firm and it chops up better.
3. Don’t pour grease down the sink. This is bad on all levels— the disposal, the drain pipe, the smell…you get the picture.
4. Space out showers. If everyone waits until the last minute, someone’s getting a cold shower. Give your water heater time to re-heat the water in between. (Tip: Have some people bathe at night.)
5. Make sure your toilet isn’t continuously or randomly running. If it’s running and not being used, it could be a faulty rubber stopper. This is easy to change, and expensive if you don’t.
6. When all else fails, keep a drain snake and toilet plunger handy. Let’s face it, life happens and things can get messy.
- Published in Tips of the Trade
Take a Little (Water) Pressure Off
Yes, it’s nice having powerful water pressure for things such as dishwashers or showers, but the reality is, high water pressure puts extra strain on your pipes and can wreak havoc on your plumbing system—not to mention ceilings, walls and floors if a leak occurs. It also puts additional stress on appliances such as your washing machine and water heater. Over time, even pinhole leaks can cause expensive damage. Excessive force can cause pipe joints to break, valves to leak, and over time cause toilet parts to succumb.
High water pressure also wastes water, and what you may not know is that many municipalities not only charge for water consumption, but also for the disposal of wastewater. Reducing water consumption also reduces the excess energy needed to heat the additional water- hence, more money in your pocket.
There are a number of indications your pressure is too high. Typically you will hear banging somewhere in your pipes, or you may have leaks in fixtures that only appear intermittently, such as at night. Another indication is when toilets start running when they are not being used.
There are a few reasons your water pressure could be higher than needed. One of the major causes comes from the municipal water supplier, who can often set the pressure to meet their own needs such as delivering water to fire hydrants or high elevation buildings. These are often set over 100psi, and too often over 150psi. For a residential home, the maximum should be 80psi. Living at the bottom of a hill is another common reason for high water pressure.
Fortunately, the solution is simple. A water pressure reducing valve automatically reduces the pressure from the water supply to a slower, more sensible pressure. The valve is installed directly after the water meter and even if the supply water pressure fluctuates, the pressure reducing valve ensures a constant flow at the set pressure.
There are different types of valves, along with different installation configurations, so if you are inexperienced in plumbing, this is a job that is best left to a professional.
- Published in Tips of the Trade
Hard Water Fixes? Not Hard at All.
Where the term “hard water” originated is a bit uncertain. Some people say it’s from the minerals “hardening” on the surface, some say because it’s “hard” to clean, and others say it’s because it makes it “hard” to get soap to lather.
Whatever the origin, due to the amount of minerals, hard water has a big impact on day to day life. It can shorten the life span of clothes by up to 40%, dry out skin and hair, damage the functionality of appliances, leave spots of film on dishes, clog pipes, reduce water flow and can increase energy bills by up to 25%.
Don’t worry, it sounds like a daunting list, but with some maintenance, you can keep the damaging effects at bay and it becomes nothing more than a nuisance.
First, let’s talk about the problem. What causes hard water?
Hard water is contains calcium, magnesium and sometimes even iron. It is created when the water absorbs the minerals while passing through soft rock such as limestone. (And Florida’s land contains large amounts of limestone.)
Don’t fret, you have options.
Option 1: Purchase a water softening system.
These systems can eliminate the calcium and magnesium replacing them with a softer mineral like sodium or potassium. Systems will vary in cost depending on the size of your home, but if it’s financially viable, this option could double the life of your appliances.
Option 2: DIY
When it comes to do-it- yourself pipe and plumbing fixture cleaning, you can either use a commercial hydrochloric acid product (**Use with extreme care** Muriatic Acid is a weaker form of Hydrochloric Acid, however extreme care is still highly recommended.) or a natural cleanser of vinegar and baking soda. Both work well, however the commercial products can be expensive, and you don’t want to risk getting it into your potable water. (Also be sure to wear gloves and goggles while working.) The benefit to this method is that it only takes about 10-15 minutes and the instructions are pretty self explanatory. With a natural cleanser, it takes more time but is less expensive and as the name implies, is all natural. We’re going to give you the low-down on the natural method, but as we said, it’s a personal preference.
The Natural “How”
To clean fixtures:
Use one part white vinegar to 3 parts water. Dismantle removable parts and put to soak in vinegar solution. Use a toothbrush or other soft bristle to scrub calcium away. For the main fixtures, soak a soft cloth with the solution, then wipe the fixture to remove any flaking. Rinse cloth, re-soak in vinegar solution, then wrap around the fixture for 15 minutes. The rest of the deposits should clean away easily.
For Pipes:
For a 1,000 sq. foot home, you will need 2-3 gallons white vinegar and 1 cup baking soda per drain.
Fill a large pot of water for each drain. Shut off all taps, including any outdoor faucets. Put 1 coup of baking soda down each drain and slowly pour in the vinegar, (as much as the sink will hold,) it should bubble and fizz. This solution should sit for about 3-4 hours. 30 minutes before the solution is ready to drain, boil the pots of water. When ready, pour down the drains quickly and forcefully, which will dissolve grease and soap and help sanitize. Open the faucets one by one at full blast. You may see calcium and limestone chunks, which is normal. Some of the residue may be powdery and stuck at the bottom of the pipes. It’s a good idea to open the drain pipes and clean out the p-traps.
Just remember, it’s not rocket science, but it is important not to let it go too long or you may end up replacing pipes.
- Published in Tips of the Trade
Sun, Sea, Sand and Sump Pumps
Yes, we said sump pumps. While Florida is known for it’s warm weather and sand, rain and severe tropical storms are also a reality. In 1987 the Federal Clean Air Act required all new construction to have a sump pump, but it’s just as important in existing homes, particularly if the property is prone to flooding.
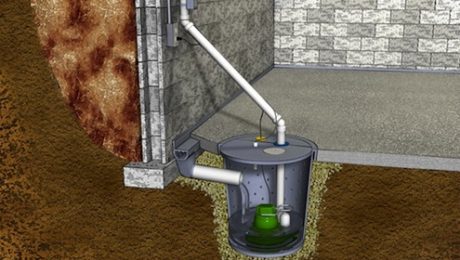
What’s a sump pump? An electric pump installed either in the basement floor or outside the home in a basin which is below the lowest level in the house. which The pump is activated by rising water and removes the water from the house or from below the house before flooding occurs.
There are two types of sump pumps; submersible and pedestal.
A submersible pump sits entirely within the sump basin. When water is present, some or all of the pump is submerged. As the water rises, a float or pressure switch turns on the motor and pumps it out to a minimal water level. Because the pump is underwater, it runs cooler and lasts longer. Another benefit is because everything is contained within the basin, it can be covered with a lid.
A pedestal pump is mounted on a stand above the sump basin, where most of it remains dry. The water comes up through a suction pipe and the pump is triggered by a float or pressure switch. Since the motor and electrical connections are not submerged, it’s easier to perform routine maintenance and switch components. The downside is that the pump isn’t covered.
It’s easy to forget about the sump pump when doing regular plumbing maintenance, but this is one fixture you don’t want to neglect; when you need it, you REALLY need it.
Three things can cause your pump to fail:
• Clogged discharge lines
• Power failure
• Lack of maintenance
Keep in mind, during heavy storms or prolonged periods of rain it’s not uncommon to lose power. Power failure can be mitigated with a battery back-up system, which is highly recommended. To avoid the other two causes, test your pump regularly. A professional can test more thoroughly, but you can certainly do it on your own if necessary.
To check:
• Make sure the power is on.
• Clear debris from the sump basin.
• Fill the basin with water to the level where it will activate the pump.
• Lift the float and make sure the pump kicks in. (If it doesn’t, don’t leave it running, which could cause damage.)
• If the pump is working, let water run through it to clear out the debris.
• If it’s not working, call for repair.
- Published in Tips of the Trade
5 Tips to Keep Your Water Heater Healthy
Most people would agree, hot water is important.
What you may not know, is when water is pumped in, dirt and minerals also make their way into your water heater, which makes the heater work harder, and unfortunately, causes it to slowly rust.
It sounds worse than it is. With the right maintenance, your water heater should last about 15
years, and fortunately, it’s not difficult. Here are five things you can do to keep things running smooth and efficiently.
1. To save on energy costs, turn the thermostat down to 120 degrees. For every 10 degrees you lower the temperature, you’ll save approximately 5% in energy.
2. Insulate older units to improve efficiency. This reduces heat loss by up to 45% which could shave an average of 9% off of your water heating costs.
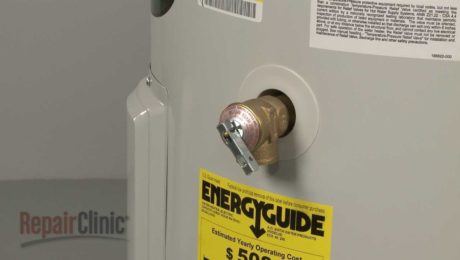
3. Each year test the Temperature and Pressure Relief Valve (TPRV.) This valve prevents excessive pressure and keeps the water heater from exploding. To test the TPRV:
• Turn off the power and cold-water supply valves.
• Place a bucket underneath.
• Lift the valve to let some water out, then let go, if it keeps flowing or dripping, you’ll need to drain the tank partway and install a new valve.
4. Drain 1/4 of the tank a few times a year to remove sediment and debris, (and the heater will
run quieter.) To drain:
• Turn off the electric or gas to extinguish the pilot light.
• Hook up a garden hose to the drain and run water to the exterior or bathtub ten to fifteen minutes. Make sure no other hot fixtures are in use while performing this.
5. Change the Viable Anode Rod about every five years before it fails. Doing this could double the life of your water heater. The rod attracts corrosive elements and keeps them out of the water. However, when the rod itself gets corroded, it can’t do its job and the water heater could rust. (Do not remove it permanently or it will void manufacturers warranties.) There are a couple of options for the type of rod you use.
• A magnesium anode rod protects better but doesn’t last as long.
• Aluminum/zinc rods are cheaper and are recommended for smelly water.
• Be sure to consult a water treatment specialist before purchasing and installing a new rod.
- Published in Tips of the Trade
10 Plumbing things to check before buying a home
10 things to check about the plumbing before buying a home.
It’s true, older homes are charming and full of character. In many cases the materials stand the test of time but not always; plumbing is a different animal. Below are 10 things to check before writing the big check.
1) Sewer line. Have a professional look at the sewer line to the street. It’s important to run a video camera through the line to identify potential problems. Tree roots, corrosion or clogs can all break down the pipe, and trust us, you don’t want it to collapse.
2) Water heater. Check the age, water heaters should last at least 10 years, if it’s much older than that, you might consider replacing it. Look at the location, will it cause problems if it leaks?
3) Toilets. Check for leaks at the base, this can lead to significant damage. Sealing the leak will make the problem worse. Look for a rocking toilet, discoloration at base or warping. Flush each toilet to make sure there are no clogs.
4) Water supply pipes.
- Determine the age of the pipes and whether or not they have been replaced.
- Are the pipes copper or plastic? If so, they have probably been replaced. Most copper and plastic don’t corrode like steel. However, some plastic is not approved for use inside, such as PVC pipe.
- If they are galvanized steel, they are probably old and will eventually have to be replaced. Look for small holes which could be rust.
- Are the pipes a mixture of different materials? This is usually a sign of minimal repairs being done and could require replacement.
- If the pipes are cast iron, they will have to be replaced because of mineral build up, corrosion or leaks.
- Pipes made from polybutylene should be replaced. These pipes a grayish, flexible plastic used from the 1970’s to the 1990’s. Chlorine erodes them over time.
- All lead pipes should be replaced.
5) Inside water lines. Check the lines you can see—either under the sink or in the basement ceiling. Look for water discoloration or leaks.
6) Drain lines. Even though these lines generally don’t corrode, play it safe and look down the drain.
7) Water taps. Turn on the taps to check for rust. If the home has been sitting vacant, it’s normal for a bit of rust to drain out, but if the house is occupied it could be corrosion.
8) Water Pressure. To test the water pressure, turn on all faucets at once. To get high enough pressure, you’ll need 3/4” pipes from water source to home, and at least a 1/2” or more to faucets.
9) Crawl space and basements. Look for water damage, leaky pipes or inadequate repairs.
10) Shower pressure. Although there are many models with varying pressure, make sure there is a solid stream of water.
- Published in Tips of the Trade
Pipes – Repair or Replace? That is the question…
Homeowners walk a fine line between maintaining existing plumbing fixtures and knowing when to bite the bullet and replace them. Weighing the cost of replacement with the potential cost of a plumbing mess isn’t easy so here are a few tips to help you assess the situation.
Pipes
First things first, figure out what kind of pipes you have and how old they are. Supply pipes made of brass, copper or galvanized steel should last 80-100 years. Drain lines made of cast iron should also last this long. Polyvinyl Chloride (PVC) pipes generally last 25-40 years, but are traditionally known to break or leak. These figures can vary dramatically depending the quality of your water, the quality of the material used, and how well the systems have been maintained.
If your pipes are on the older side, it doesn’t necessarily mean they have to be replaced. However, if you have lead or polybutylene pipes they should be replaced regardless. Lead leaches into drinking water and polybutylene is extremely prone to leakage.
Check areas around pipes for discoloration, stains, dimpling, or flaking, which could mean you have a leak. If you see anything out of the ordinary, look for other leaks— chances are there’s more.
Watch the color of your water, especially after vacation when it hasn’t been running. If it’s a yellow or brownish color, you could have rust.
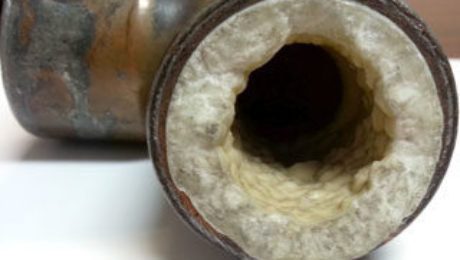
Do you have hard water? If so, you have an above average concentration of minerals like calcium and magnesium, which leaves scale, or a film, behind. This film can accumulate in your pipes and other water-involved fixtures, eroding them.
Fixtures
Fixtures are relatively inexpensive to replace and can save you money in the long run. Newer model faucets, showerheads and hoses generally reduce water usage and are more energy efficient. If you have leaks, it’s best to replace the entire fixture instead of trying to fix it.
Toilets
Toilets can last a long time, so it’s easy to say, “If it ain’t broke, don’t fix it,” but the improved water efficiency justifies the investment; not just for the money savings, but because it’s better for the environment.
Definitely replace the toilet if the porcelain is cracked, if it’s flushing poorly, constantly running, or has a hissing sound which means the float and fill valve may be wearing out. The handle alone can be replaced if it won’t flush, or if the toilet constantly runs.
Water Heaters
Traditional water heaters should last 10-15 years, and tankless heaters should be good for 20 years depending, again, on the quality of your water. Replace your conventional heater if the pilot light keeps going out, or if the circuit or breaker keeps tripping in a tankless water heater.
Other indicators it’s on it’s way out are if the burner or heating element is failing, the thermostat breaks, valves are sticking, or if there are leaks and rust around the heater.
Garbage Disposals
Garbage disposals should probably be replaced every 10 years. It’s time for a new one if you constantly get clogs, your food takes a long time to break down, you have to keep resetting the disposal, or if there is a lingering odor that won’t go away.
- Published in Tips of the Trade
Waste not, Want not
We know, updating your leaky faucets, high flow toilets and inefficient water heaters is not at the top of your “Wish List,” but making these few small improvements will add up to more than just savings on your water bill, it saves thousands of gallons of water.
Fortunately, knowing the importance of these simple fixes, the federal tax credits for energy efficiency have been renewed for purchases made in 2016 and retroactive purchases of EnergyStar Products in 2015.
There are many rebates, incentives and credits available to help lower the price tag, we’ve outlined a few of them below. Take advantage of them and make your home more efficient. Trust us, it’s worth the effort.
Water Heaters:
Water heating accounts for about 18% of energy use in your home. The average water heater lasts 10-15 years, and even if it’s still chugging, replacing with an efficient water heater makes financial sense. Not to mention, if the tank should rupture, you could have a real mess on your hands. For more information on selecting a water heater, rebates and other water saving tips check out this infographic from Energy.gov
• Residential Rebate for an Energy Star Heat Pump Water Heater; The Orlando Utilities Commission (OUI) will pay 100% of the cost up to $650.
Toilets:
The Environmental Protection Agency reports that toilets are by far the main source of water usage, accounting for almost 30% of an average home’s indoor water consumption. To give you perspective, older, inefficient toilets can use as much as 6 gallons of water per flush, whereas new models can use just 1.28 gallons per flush. This kind of savings could save billions of gallons of water each year.
• Orange County Utilities is accepting applications for $100 vouchers toward replacing high-flow toilets.
• Orlando Utilities Commission is offering a $50 rebate for replacing a toilet with a flow greater than 1.6 gallons per flush, with an ultra-low flow toilet of 1.6 gpf or less.
Faucets and Showerheads:
More than just being flat out annoying, leaky faucets and showerheads are a huge waste. One drip per second wastes 1,661 gallons of water and can cost up to $35 per year. (energy.gov)
Orange County Utilities offers a Showerhead Exchange during the month of April. Orange County Utilities water customers can receive up to three showerheads to replace showerheads that use 2.5 gallons per minute or more.
For more information go to:
• Florida Tax Credits, Rebates and Savings
• Or use the Rebate Finder on EPA.Gov
- Published in Tips of the Trade
To Snake or not to Snake
When tough clogs happen, (and they will) don’t panic. Unclogging a drain can take as little as 5 minutes (in some cases).
First things first. Don’t use Draino or other liquid drain cleaner. The toxic chemicals are bad for your pipes, especially in old houses where they can’t withstand the acid. Not to mention if it doesn’t work, you’ll have a whole mess of toxicity to deal with. Also, the chemicals can react with the grease and soap in the line and make matters worse.
Which leads us to the snake; a long, flexible steel coil for dislodging stoppages in curved pipes. It costs roughly $25.00 and is worth every cent.
Using the snake is fairly simple. Push the end into the drain opening and turn the handle on the drum containing the coiled up snake. Keep pushing until you feel resistance then rotate it against the blockage until you feel it move freely through the pipe.
However, many times you can dislodge the clog before it gets to this point so before you pull out the coveted plumbing tool, start with a few of the following tips.
Kitchen Sink
Kitchen clogs are most often caused by built up grease and debris such as coffee grounds, so start at the top to search for the clog. It’s important to plunge the sink first to make sure it isn’t just below the drain. Cover the side that isn’t clogged and plunge the other. If this doesn’t work, check the disposal.
- Turn it on and if you hear a low humming sound it’s probably jammed. Unplug or turn off the disposal. Push back the rubber splash guard in the throat of the disposal. Visually inspect the inside of the disposal with a flashlight to make sure there are no broken pieces of glass or other sharp objects that could cut you. With a long screwdriver or broom handle make sure the cutting blades are free-spinning. Manually turn the blades. You can do this by inserting an Allen wrench in the bottom of the disposer and twist.
- If the disposal doesn’t make a sound when you turn it on, an internal breaker has probably tripped. Let it cool off and push the reset button on the disposal.
Still clogged? Move on to checking the “P-Trap,” named for the shape of the drain. This is the trap arm which is curved to trap some water so that sewage smells don’t creep into your house.
Sponge the backed up water from the sink to minimize the amount that will spew out when you open the drain. (Keep a bucket handy to catch the trapped water.) Once you take the drain apart, inspect for a visible obstruction.
Still no luck? Snake.
Bathtub
Ironically, the area we use to wash ourselves can get down–right gross. Start by cleaning out the strainer and stopper of hair and soap scum. The problem is usually a sticky wad of hair collecting on the cross bars just a few inches under stopper, which can sometimes be loosened with a plunger or removed with a pair of needle nose pliers. Fill the tub with a few inches of water and cover the overflow opening with a wet rag held tightly in place. Submerge a plunger and see if you can dislodge it.
If this doesn’t work, bend a stiff wire or coat hanger to form a hook and shove it through the drain. If there is a clump of tightly wound hair, you may have to cut it, and if you still can’t get it…snake.
Tubs are trickier. Instead of simply feeding the snake straight down the drain, you have to go through the overflow plate opening. To do this, put approximately 3’ of the snake down the drain until you feel a resistance. At this point, the snake should either push through or grab the clog. Once you are through the trap, move the cable back and forth while turning; you may may feel the clog. Stay close to the drain to control the snake better and clean it as you pull it back.
Run water to see if the drain is clear. If not, repeat the process. Caution, don’t push too far or you may snag the snake which could require professional help.
Bathroom Sink
The bathroom sink is one of the easier drains to unclog. Remove the pop-up stopper by disconnecting it under the sink, then pull it out from the top and clean.
If that doesn’t work, disconnect the drain trap, (again, keep a bucket handy.) These clogs can be caused by object such as a toothpaste cap or a hairband which can be quickly disposed of. If this isn’t the cause, loosen the trap arm and pull it straight out of wall. If you now see a visible obstruction, remove it. If not, put on the gloves and snake.
Toilet
Obviously the easiest method to try is plunging. The first plunge should be gentle in order to force the air out and avoid spraying water everywhere (yuck).
Plunge vigorously without breaking the seal. Stick with it, it may take 15-20 plunges. Fortunately, (or not) the most common objects plugging a toilet are toys.
Still not working? Snake.
*For toilets there is a closet auger specially designed to get through the trapway of the bowl. It also has a rubber sleeve to protect the toilet bowl from scrapes.
At this point, if it’s still clogged, call a plumber. The toilet may have to be removed to get the clog out and then reset which can be tricky.
Sewer Lines
Sewer lines should not be treated lightly. If you notice any of these signs, call a plumber.
- Gurgling noises in the drain or toilet.
- Sewer odor.
- Water back-up or flooding.
- Sewage backup.
- Water backing up out of the basement floor drain.
- Toilet bubbling or gurgling when flushed.
An ounce of prevention is worth a pound of cure.
Stay on top of your drains and you’ll have better luck keeping them clear.
- Use strainers in every drain and clean them often.
- Don’t drop bits of soap down the drain thinking it will dissolve, it won’t.
- Once a month pour a kettle of boiling water down the drain to melt grease or body oil. (Don’t do this with the toilet, it will crack the porcelain.)
- Every 3 months pour 1/2 c of baking soda down drain then slowly add a 1/2 c white vinegar and let it sit. Run hot water afterward to get rid of any last debris. (Bonus: It leaves the drain fresh!)
- Published in Tips of the Trade
At Your Disposal
Chances are, you’ve stood in your kitchen and asked the question, “What is that smell?” Chances are, it’s your garbage disposal. It may seem counterintuitive given the job of a disposal is to get rid of food scraps, but it happens.
Rotating stainless steel blades are mounted on a spinning plate, breaking food scraps down into tiny particles. These particles are shoved washed through little holes and spaces in the plate. Once they are ground, running water flushes them out and into a wastewater pipe. The particles then flow to the sewer or into your septic system. Always use cold water when using the disposal.
The smell comes from food and bacteria that get stuck on the plates causing it to rot and smell. But don’t fret, there are simple fixes that generally don’t require a plumber.
• Water, Ice and Citrus: Turn on the unit and run cold water. While it’s running, drop ice (2-4 trays) and rock salt into the disposal and feed it as quickly as it will take it. This will freeze everything stuck on the plates causing it to chunk off. (Bonus: the ice will help sharpen the impellers and the salt will help disinfect.) Let the water continue to run, then chop a lemon or other citrus into small chunks and drop them in, which will leave a pleasant scent.
• Vinegar and baking soda: Turn on the disposal and pour in 1 cup of dry baking soda with 1 cup distilled white vinegar.
• Bleach: Run a mild or slightly scented bleach and cold water through the disposal.
• Scrubbing: Unplug and disconnect the unit and use a dish brush or wire brush to clean the inside. Be very careful if you use this method and make sure the unit is completely turned off.
• Dishwasher discharge: Have your plumber make sure the the drain hose from your dishwasher is connected to the port on your disposal. This will help keep your disposal clean and odor free.
To keep the smells at bay, here are some preventative measures to keep in mind.
• Don’t do anything that won’t break into tiny pieces or completely dissolve.
• Don’t drop in fibrous items like celery or banana peels that will wrap around the plates. Things like rice, pasta, coffee grounds or potato peels will clump up and stick, clogging the disposal. Never try to grind bones, fruit pits or other food particles that won’t break down.
• Don’t deliberately put grease down the disposal.
• Don’t use hot water for cleaning or in your day to day use. This will cause any grease or oil that did make it to the disposal to loosen up and congeal, clogging your pipes.
Garbage disposals may seem like a luxury, but actually they are environmentally responsible. Diverting food waste from landfills is one of the most important things we can do to affect climate change. Food waste emits methane, a potent greenhouse gas having a warming temperature 21 times that of carbon dioxide. Compost can do the same, but is not always a feasible option. For more information: Diverting and converting food waste.
- Published in Tips of the Trade

